WEB-Switch 1216E / Automatic Antenna switch
The Webswitch 1216E are discontinued and replaced by 1216H
WEB-switch 1216E is a remote controlled switch with 5 relay outputs 230V/16A which can be controlled independently via the built in web server from any computer connected to the Internet. It can also be configured as a automatic antenna switch connected to the radios CAT interface . It's perfect suited for controlling coax relays, switching the Rig on/off or maybe the Power Amp. No PC is needed like in USB switches everything is built in the box, the WEB-switch is connected directly to the local network. If the WEB-switch is located behind a NAT-router you need to set up a port forwarding in the router to the WEB-switch to make it reachable from the outside. The WEB-switch default IP is 192.168.0.236 and the built in WEB-server is using port 80. IP-address can be changed via ARP with the small PC-software called IP-setup which you can download on this page. IP-setup can also be used to update the firmware. An important feature is that the switch is remembering the Relays statuses even after a power failure. The relay statuses is indicated by LED:s. The Settings is protected by a password.More:
The
WEB-Switch can also be used for remote temperature (
more info) checks or for temperature
control if you connected temp sensor (Dallas DS18B20) by your self. The Switch
fits into a standard DIN-rail system (6M).
There are lot of cheap DIN-boxes which can be used for outdoor installations.
|
Power |
>9-12V
AC or 9-16V DC |
|
|
|
|
Power consumption |
max 300 mA with all relays active |
|
Relays |
230VAC/16A (5x1 pol) |
|
LAN interface |
10Base-T (Ethernet) RJ45 |
|
Indications LAN Interface |
2 pc. LED in the RJ45 connector |
|
|
|
|
Indications common |
Relay 1-5 status and Power On |
|
|
|
|
Dimensions (lxwxh) |
105 x 86 x 49 mm 6 Modules DIN-rail |
|
Temp. range |
0-55°C |
|
Options |
Inputs for two temp sensors (single wire bus DS18B20) |
|
Software for setup |
IP-setup to set IP, Netmask etc. and for firmware update |
Down below follows more info about the WEB-Switch.
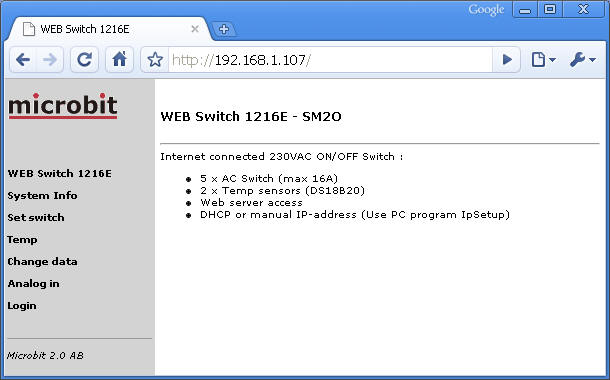
Above:
First
>age of the
WEB-Switch Internal web server. In the example it
has the IP-adress 192.168.1.107. To the left there is
hyperlinks to other internal information pages.
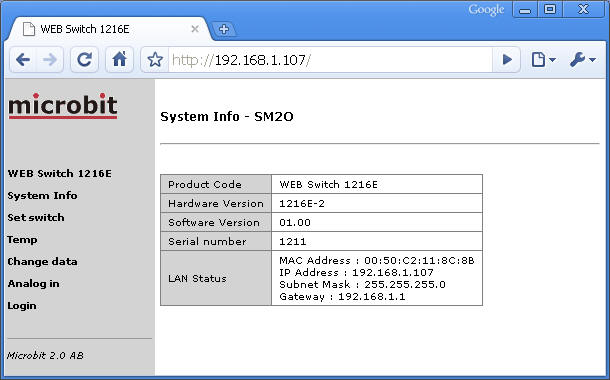
Above:
Behind the Link "system" you will find information about the
unit. Firmware versions, IP-addresses etc.
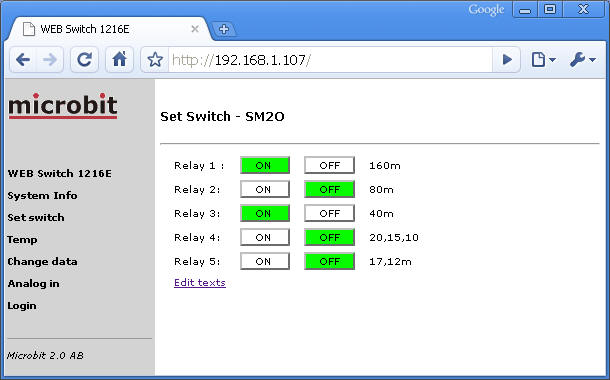
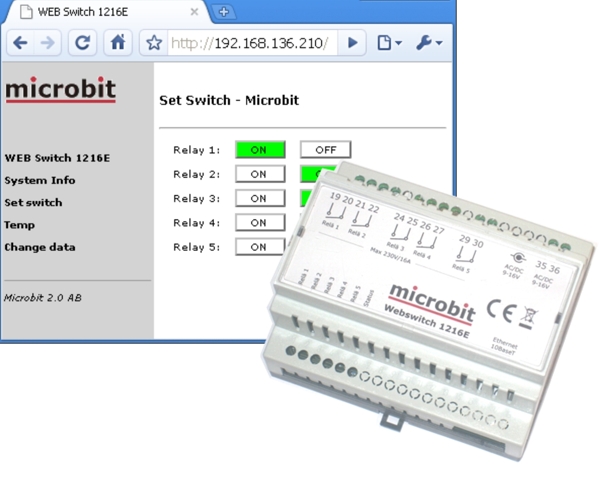
Above: On the webpage behind the link
"Set
Switch" you can control the relays,
the individual statuses is indicated by the green colour. A short describing
text can be set to each relay. Be aware of that you
need to be logged in to control the relays.
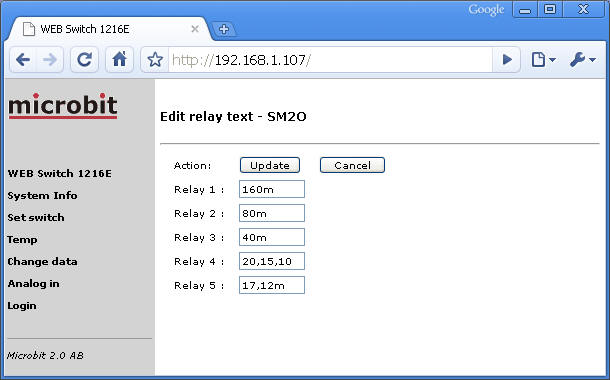
Above:
The menu for editing the describing texts. Be aware of that
you need to be logged in to editing the texts.
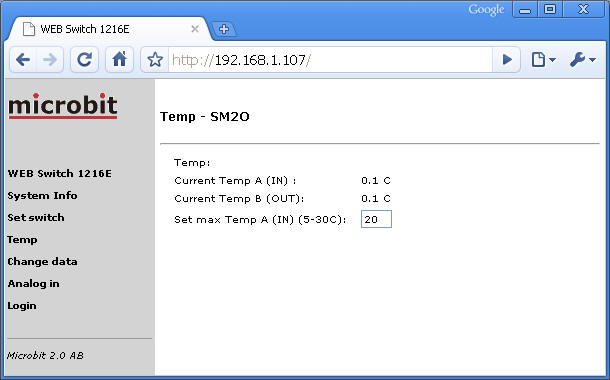
Above: behind the link "Temp"
you can check the two temp sensors if they are connected. You can also set
the wanted temperature if you use the WEB-switch for temp control.
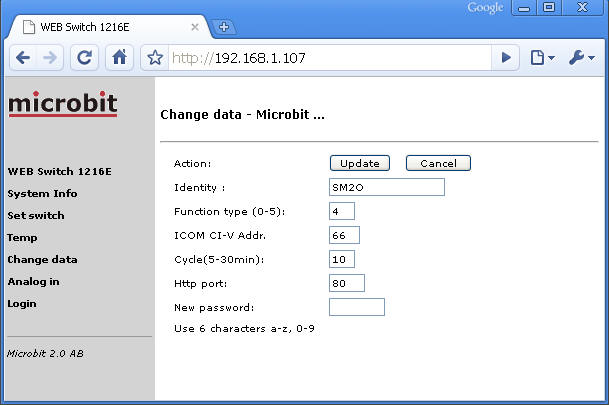
Above: Behind the link "Change
data" you can make some initial settings. Identity
<>is the text which is shown on top of most internal web
pages. Function type select how you want to use the
WEB-Switch. 0= All relays are controlled manually. 1= Relay 1 will act as
soft temperature control. Cycle set how long the
total control cycle is, in slow systems like a house you may use 15-20 min,
in a small cupboard shorter may times fits better. If cycle time is
set to 0 the cycle time is set to 20 s. If you just use the WEB-Switch just
for reading temperatures set cycle time to 0 to get shortest possible
update time. In the box "Http port"
you can change the port for the Internal WEB-server from standard port 80.
It can be convenient in combinations with routers and port forwarding.
Be aware of when you change IP-address with IP-setup
the http port is always set back to 80. I<>n
the box "New password" you can change the password
which is needed to make setup changes or control the relays. The password
will change back to default "1111111" when
you change IP-address with IP-setup.
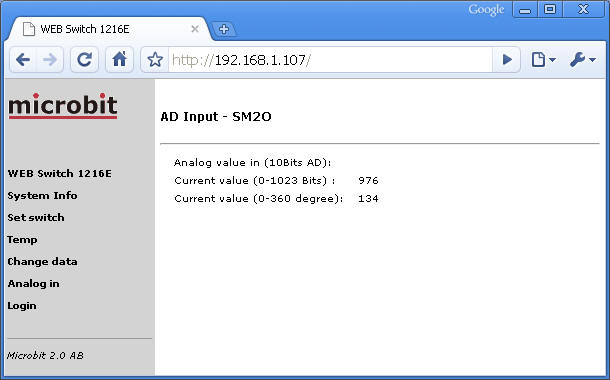
Above:
The web-pages for reading the analogue input. The A/D
<>converter has 10 bits resolution. 5,0 V
input = 1063 or 360 deg. 0 V <>gives 0.
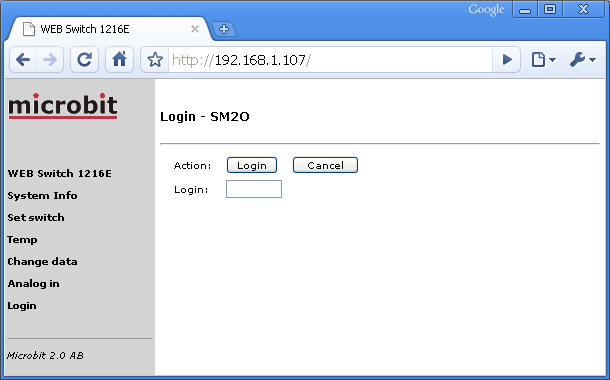
Above:
The Login page, fill in the password
and click "Login". You do not need to login again until you change your IP-address.
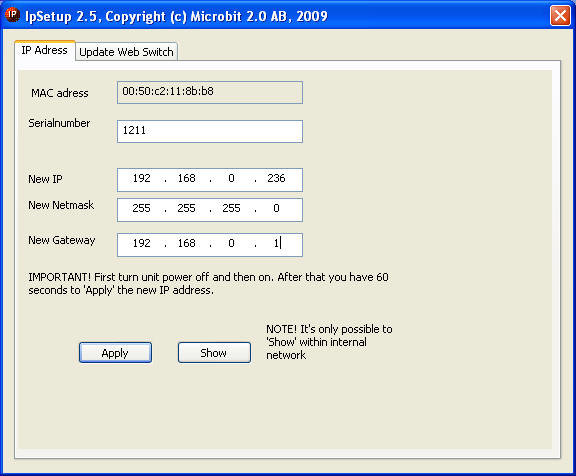
The Software IP-Setup is used to change the IP-address of the WEB-switch. There is no other user Interfaces so we need to use the TCP/IP Network to set the IP-address. It's done from the IP-setup with a encapsulated standard protocol ARP. When you start up the program ( no installation needed) you will see the dialog below. When you enter the Serial number of the WEB-switch, IP-Setup calculates the MAC-address <>automatically. The Serial number is available from a sticker on the bottom of the switch. Enter the network parameters on in resp. box. To make the function more secure you need to program it within 60 s from restart. That's why you always should disconnect the WEB-Switch from power for a few seconds before pressing "Apply" to confirm the new settings.
The IP-Setup software only works 100% with Windows XP.
The IP-Setup software is here
IpSetup_v2.7.exe
IpSetup_v2.6.exe
IpSetup_v2.5.exe
If the
programming succeeded the box below will show up.
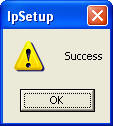
Use your Internet browser to connect to the new IP-Address.
If you will
use the WEB-Switch for remote control over the Internet it will most of the
times be placed behind a NAT-router, witch means it will not be directly
accessible from the Internet. Fixed IP-address is also not very common witch
is an other problem. The most common solution to this is to use
port forwarding in the router and register a DynDns account (free).
The port forwarding <>makes it
possible to setup the router in the way that a "call" from outside to port
8001 is mapped to the Inside IP-address used by the WEB-Switch and to port
80 for example. If the router does not support port translation it's
possible to change the http port number in the WEB-Switch. As an example you
can set the WEB-Switch http port to 8001 then the router can do a straight
mapping ( most of the Netgear routers only handles straight mapping).
At www.dyndns.com you can register a account, witch gives you a dns host name witch can be used for accessing the WEB-switch from the Internet. The router at the remote site must also be programmed to send the IP-address to DynDNS. When you have done that a call to the WEB-Switch can look like the example below.

Almost every router from the commonly used brands supports the DynDNS functionality ( even the cheapest ones).
Good luck with the remote control....
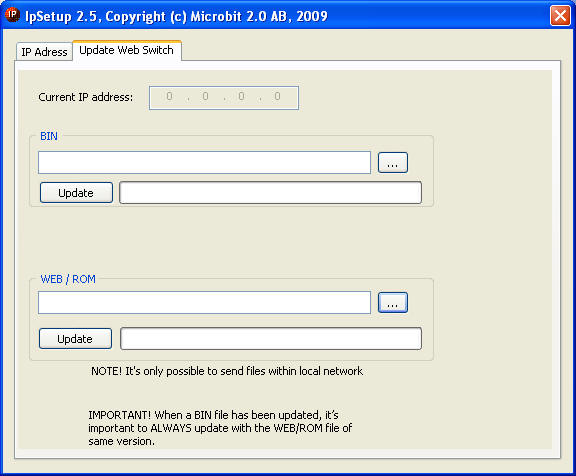
Updating the firmware (software)
The
internal firmware can be updated via the
IP-Setup
software. The .BIN file should be updated first and after that the .ROM file.
Download the files to your computer (Desktop) and start the IP-Setup. Select
the files Update the BIN file
first by clicking on the "Update" button, when it's done, update the
WEB/ROM file by clicking the associated button. Before Updating check that
the right IP-number is shown in the "Current IP address" box. If not go to
the "IP-address" dialogue and change to the correct IP-address. Updating
firmware is only possible when connected to the same LAN, not over the
Internet.
| 1216E_v1.07_2010-08-23.bin | 1216EWEB_v1.07_2010-08-18.ROM |
- New support for both heating and fan control. Radio
cabinet climate control -Fix for ICOM CI-V addresses |
| 1216E_v1.06_2009-06-25.bin | 1216EWEB_v1.06_2009-06-25.ROM |
Handles
Wildcards fq-control, some bugfixes. |
| 1216E_v1.04_2009-05-19.BIN | 1216EWEB_v1.04_2009-05-19.ROM | Handles
manual control of the relays in combination with CAT control. |
| 1216E_v1.03_2009-04-24.BIN | 1216EWEB_v1.03_2009-04-24.ROM | First released version. |