
Discontinued product (The Wifi module from Redpine Signals is no longer available and there is no replacement)
An alternative solution for WIfi connection is to use a externa Wifi Client like ZyXEL WAP3205v3 ( it’s very cheap also, app €25 )
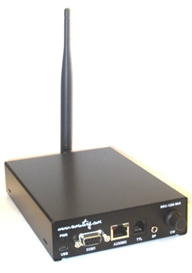
 All versions of the RRC-1258, RRC-1258MkII etc. can be equipped with a internal WiFi Interface. A WiFi interface is convenient when you want to connect the RRC:s to a WiFi network both at home or when traveling.. You do not need any extra cables or boxes. For the Control-RRC the main reason to use WiFi might be the portability, and for the Radio-RRC to physically separate the RRC from the telephone/DSL line which is the most common route for lightning storms to hit the RRC and the Radio. The WiFi Interface is mounted on the pinheader P3 in the RRC-box. RRC-boxes produced from summer 2012 has the pin header in place from production and no soldering is needed. If you have an old RRC with no pinheader in place you can order it from the Webshop. Instruction for how installation is done in old RRC without the pinheader can be found on the Remoterig website under Support/Mods (hardware). The 2.4 GHz Wifi Interface is compliant to 802.11b/g and single stream 802.11n and supports WPA2- (AES), WEP (64 and 128 bit) modes of security in infrastructure mode and also TKIP in SPI mode. There is no limitations compared to Ethernet, all settings that are used when they are connected to Ethernet can be used. The WiFi Interface do not support ad-hoc, so it’s not possible to connect a Control-RRC and Radio-RRC direct together with the internal WiFi Interfaces you need a Access point or a router also. The RRC automatically or manually switch between WiFi or Ethernet. IF it’s set to Auto and the Ethernet is connected, Ethernet will be used. Setup of the WiFi Parameters are easiest done from the Microbit setup Manager , see users manual for more information. A 5dBi WiFi antenna can be purchased in the web shop. For prices check the web shop.
 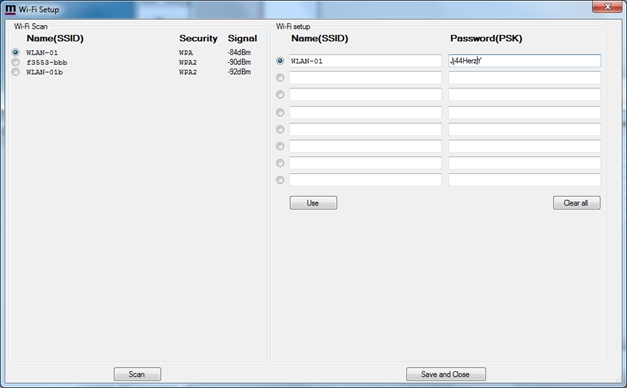 Installing Wifi Interface in the RRC
  The Wifi Interface can be installed in all versions of the RRC-1258 and RRC-1258MkII and in both the Control-RRC and the Radio-RRC. The WiFi Interface is connected to P3. Installation in RRC units produced after summer 2012 it very easy, no soldering or modifcation are needed only a plastic plug has to be removed from the housing. Note! If you have a brand new system, set it up with cabled network connections before you install the WiFi Interface to keep it as simple as possible to start with. Instructions 1 – Install the latest firmware in the RRC ( v.2.65 or later). Check the installation with your browser. 2 – Disconnect all cables from the RRC, disassemble the RRC and find P3
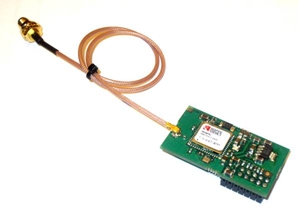
 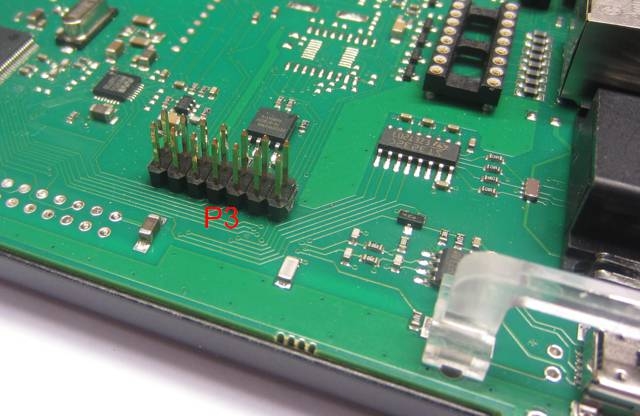 3 – Put the WiFi Interface in place as shown on the pictures. Be careful when you put the WiFi Interface in place so Pin 1 is connected pin 1 etc. If you put it wrong the Wifi module and or the main PCB may be damaged, and warranty does not cover damages caused by incorrect assembly.
 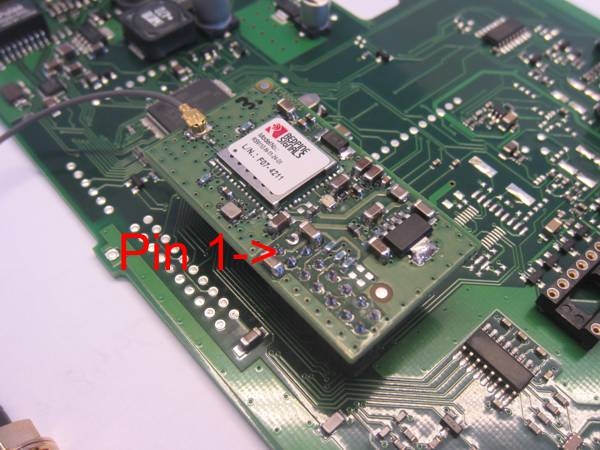 4 – Assemble the SMA connector to the top housing and the antenna to the SMA conector. 5 – Apply power and Ethernet to the RRC, the LED on the Wifi interface should be red. 6 – Browse your RRC and check the Info page. The “Wifi network” status line should show “Not connected”. (before Wifi was installed it showed Not installed) 7 – How to set up the WiFi connection is showed in the users manaual.